2023.4 Release Notes
Schedule
For an explanation of the zones, refer to Where am I hosted?
| Zone | Date | From (UTC) | To (UTC) | Duration |
|---|---|---|---|---|
| Limited Release and UK Limited Release | 28. June 2023 | 01:00 | 05:00 | 4 hrs |
| America East 1, 2, & 3 | 6. July 2023 | 01:00 | 06:00 | 5 hrs |
|
Australia and New Zealand |
12. July 2023 | 14:00 | 16:00 | 2 hrs |
|
UK, UK 2 and EU 1 (English) |
12. July 2023 | 19:00 | 23:00 | 4 hrs |
| America West 1, 2, & 3 | 12. July 2023 | 01:00 | 06:00 | 5 hrs |
| German and Spanish | 23. July 2023 | 23:00 | 03:00 | 4 hrs |
IMPORTANT All dates are subject to change. For up-to-date information on scheduled releases, refer to the Datto Status Page.
About the release
As Autotask transitions to a more agile development process, you will see smaller but more frequent releases. This release includes a Domain Settings security update, the addition of asset mapping for the Datto Network Manager integration, Payment Processing for many Kaseya modules in Autotask, improvements to single sign on with KaseyaOne, and a number of improvements and fixes.
New Features
The domain validation process on the Domain Settings page has received a security update.
- With Autotask release 2023.4, we are adding additional security features, but do not make their use mandatory. This will allow you to update your domains to meet the new requirements.
- With a second update in a future release, the additional TXT validation will become mandatory, and domains that were not updated can no longer be used as Send from domains.
Reason for this update
During recent reviews and customer inputs, we have determined that additional domain verification is necessary to ensure that the domains used for sending notifications from Autotask are indeed owned, controlled by, or authorized for, management by our Autotask customers.
Changes introduced in this update
Any domain that will be used as a potential “send from” domain will have to be verified as a domain you have authority to use. To support this validation, we are introducing some new functionality and requirements on the Admin > Automation > Email Notifications & Surveys > Domain Settings page:
- Only validated domains can be used as “send from” domains in Autotask.
- You will be able to proactively add new “send from” domains.
- You will be able to deactivate domains you no longer want to use as “send from” domains.
- In addition to the existing SPF requirement, each domain listed will have a unique ID in your database that must be added to the domain’s DNS record.
- To be considered validated, both the SPF record and the new TXT record must exist in the domain‘s DNS records.
- In addition to the DKIM authentication status, you will be able to see if a domain has been validated for use as a ”send from” domain.
What you will need to do
After 2023.4 is released to your zone, you will need to do the following:
- Go to the Domain Setting page and review each domain listed.
- Click on Authentication Details. There you will see a new Domain Validation TXT requirement that consists of a unique ID.
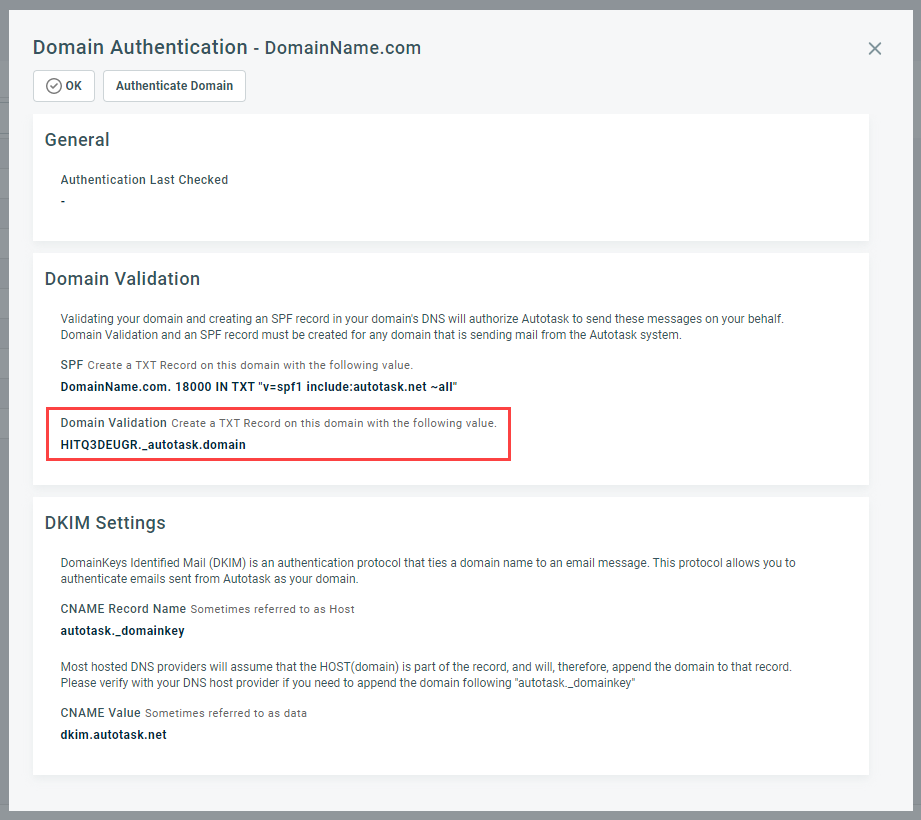
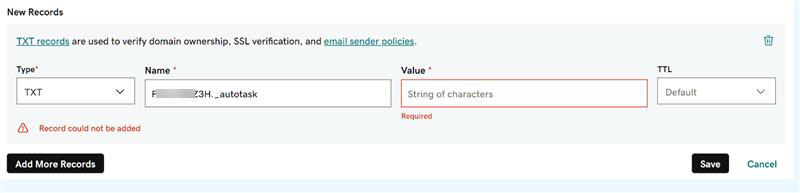
- Add this ID to the domain’s DNS as the Name of a new TXT record. Both Name and Value are required. You can pass any value (a period or space) into the Value field and it will be valid, provided the Name field is populated correctly.
- When the DNS had time to replicate, validate the SPF and the new TXT record by clicking on Authenticate Domain.
Related impact
- Shared Domains: If you have a domain that is used by more than one Autotask database (after a merger or if you are part of a network, franchise or other shared domain), the verification of that domain has to be completed by all Autotask instances. Each Autotask database will generate a unique ID for the same domain.
EXAMPLE If “co-op-it-domain.com” is shared by three databases, the DNS for that domain will have three new TXT records, which will authorize each database individually.
- Co-management: If you allow co-managing users to send notifications using their own email domain, then those domains will also need to be verified.
- DKIM: This update has no impact on the existing DKIM configurations and system settings, and DKIM will remain an optional configuration. However, the Authenticate Domain button will check DKIM at the same time.
A dialog message will let you know that the domain has been verified, but that DKIM has failed. There is no action needed if the domain in question is not setup for DKIM.
NOTE At this time, we are enabling the Datto Network Manager integration to selected partners as part of our early access program. It will be made available to all partners at a later date. If you are interested in participating in the early access program, please reach out to your account manager or contact support.
In this second phase of development of the integration between Datto Network Manager and Autotask, devices in Datto Network Manager can now be mapped to assets in Autotask. Mapped devices will create assets in Autotask. The records will sync from Datto Network Manager daily and those assets will be updated with any changes. The sync goes in one direction, from Datto Network Manager to Autotask. Changes made in Autotask will not sync back to Datto Network Manager.
Some elements of the configuration are done in Autotask, but the majority of the configuration steps will be completed in Datto Network Manager. After authentication in Datto Network Manager, you will map your Datto Networks to Autotask companies and select which Datto Network Manager device types will create Autotask assets by selecting the appropriate Autotask asset category for mapping. Unmapped Datto Network Manager device types will not sync to Autotask.
The majority of the Datto Network Manager fields will appear in a separate Details from Datto Network Manager section on the asset detail page and cannot be edited. Exceptions are the Description field and the Installed Date field which appear elsewhere on the asset entity page. These fields are populated initially from Datto Network Manager but can be edited afterward.
Additionally, the Installed By field on the asset will be populated with the name of the resource used to authenticate the integration and the Serial Number field will be populated with the MAC Address from Datto Network Manager. These fields can be edited.
The remaining fields in Datto Network Manager will map to Autotask as follows:
| This Datto Networking Device Field | . . . . maps to this Autotask Asset Field |
|---|---|
| Configuration Make | Manufacturer |
| Model | Model |
| MAC Address
|
MAC Address |
|
Serial Number |
|
| Device Name | Hostname |
| Date of first check-in | Installed Date |
| Firmware version | Firmware |
| LAN/Internal IP Address | Internal IP Address |
| External IP Address | External IP Address |
| Description | Description |
As part of this project, the attribute Associated with Datto Network Manager has been added as a workflow rule condition, widget and grid filter, and available column in asset column choosers.
Some attributes related to other Datto integrations and the initial phase of the Datto Network Manager integration have been renamed for clarity. Changes include the following:
| Former name | New Name |
|---|---|
| Created by Datto (pertains to assets) | Created by Datto BCDR |
| Created by RMM (pertains to assets) | Associated with Datto RMM |
| Created from DNet Alert (pertains to tickets) | Created from Datto Network Manager Alert |
| Created from RMM Alert (pertains to tickets) | Created from Datto RMM Alert |
Autotask Payment Processing is an integration of Autotask with Kaseya ConnectBooster. Once set up, Autotask customers can:
- Accept credit card or eCheck payments right in Autotask
- Allow their clients to process payments themselves in the Client Portal. Refer to Making a payment on an invoice.
- Apply payments made to a voided invoice to another invoice
- Issue full refunds
Once the integration is set up, you can process payments directly in Autotask, while the client's wallet information is stored in a secure vault in the payment gateway.
Activating Payment Processing
By default, Autotask Electronic Payments is inactive, and the Payment Processing page and other related features are hidden.
- You must first activate the feature on the Admin > Activations tab.
- The link to the Payment Processing page on the Admin > Features & Settings > Finance, Accounting, & Invoicing page is now displayed. Follow the steps in the Setting up Autotask Payment Processing topic to enable the feature.
- Once the setup is complete, the Process Payment window can be opened from an individual invoice or from the Invoice History page.
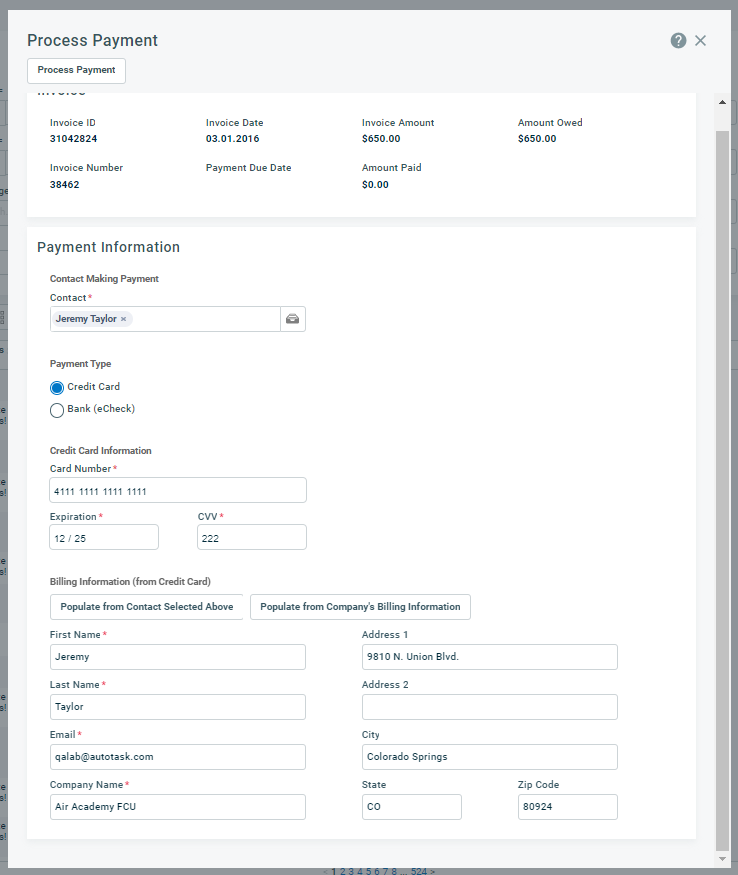
- Refer to Processing a payment.
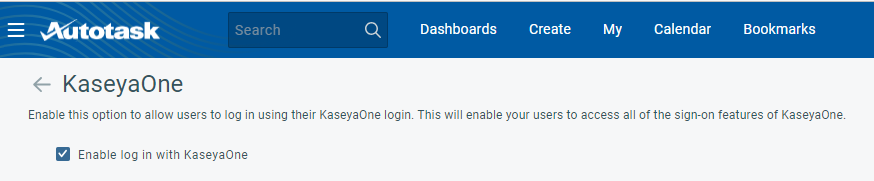
We have enhanced the Autotask integration with KaseyaOne in the following ways:
- The Autotask Admin / KaseyaOne Master User can now enable Single Sign-On with one step, by selecting Enable Log in with KaseyaOne.
- Users no longer need to manually enable the integration for themselves. As long as a user account with the same email address exists in KaseyaOne, they can select Log In with KaseyaOne.
This allows them to seamlessly navigate to KaseyaOne and all Kaseya modules they have an account for. - In this new version of Single Sign-On, we now allow multiple (up to 100) tenant registrations under the same KaseyaOne account. You may see shortcuts from multiple Autotask databases and be able to use any one to log in.
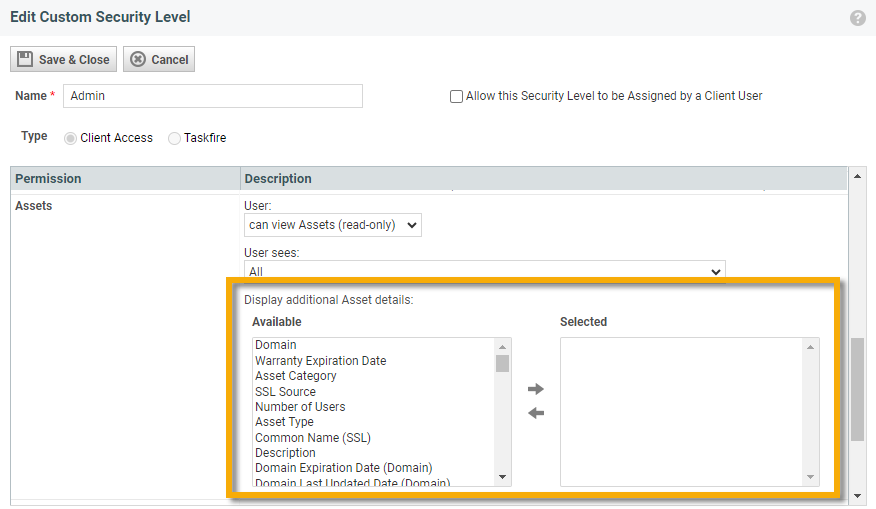
Client Access Portal Security Levels can now be modified to allow Client Access Portal users who have the ability to view assets to see selected additional asset fields. These available additional fields include Asset Category, Asset Type, Location, Description, Number of Users, Product Category, fields related to Domain and SSL Certification tracking, and fields mapped to assets from the Datto BCDR integration, the Datto Network Manager integration, and the Datto RMM integration.
To see all the available fields, navigate to a new or existing Client Access Security Level (Admin > Extensions and Integrations > Client Portal & Taskfire > Manage Security Levels) and in the Asset section, under Display additional Asset details, scroll through the list of Available fields. To make the fields available for viewing by users with that security level, double-click or use the arrows to move the fields to the Selected column.
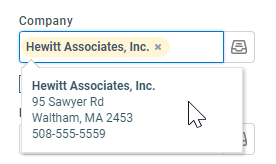
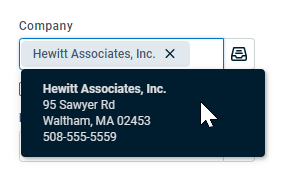
We've made minor changes to several user interface elements to align more closely to a common look and feel for Kaseya products. You may notice small changes in banners, buttons, checkboxes, drop-down menus, and radio buttons. Additionally, in light mode some hover boxes will now appear with a dark background.
When you create an email message or reply to one, the message header contains information that lets your email application know if the email is part of an email thread. In your email application, this allows you to view emails in conversation order, instead of just by date and time.
This information is contained in the Message-ID, References, and In-Reply-To fields of the message header.
EXAMPLE The message on the left is a reply to the message on the right.
When Autotask was creating tickets or notes from incoming emails, this information was stripped out. And when Autotask was generating outgoing emails (notification emails), no Message-ID was generated. This meant that in your email application, no email thread could be established, and Autotask emails could not be viewed in conversation view.
This update does two things:
- For incoming emails, it captures the Message-ID with the ticket that is being created, and uses it as the In-Reply-To identifier in all subsequent email notifications.
- If a ticket is created in Autotask or by an alert and no Message-ID is supplied, Autotask will generate one to be used as the parent Message-ID.
As a result, Autotask notification emails now generate headers with the fields required to manage conversation threads in email applications.
IMPORTANT Outlook and other email applications base the conversation view on the Subject of the message. As long as you reply to or forward an email without changing the Subject line, the message will be part of the conversation. Refer to Updating notification templates to take advantage of the conversation view.
Updating notification templates to take advantage of the conversation view
Your existing notification templates were created with the objective of adding subsequent emails as notes or time entries under an existing ticket instead of creating a new one. In Autotask, this was done by adding the [Ticket Number] variable to the Email Subject field, often combined with a text string like "Your ticket has been received."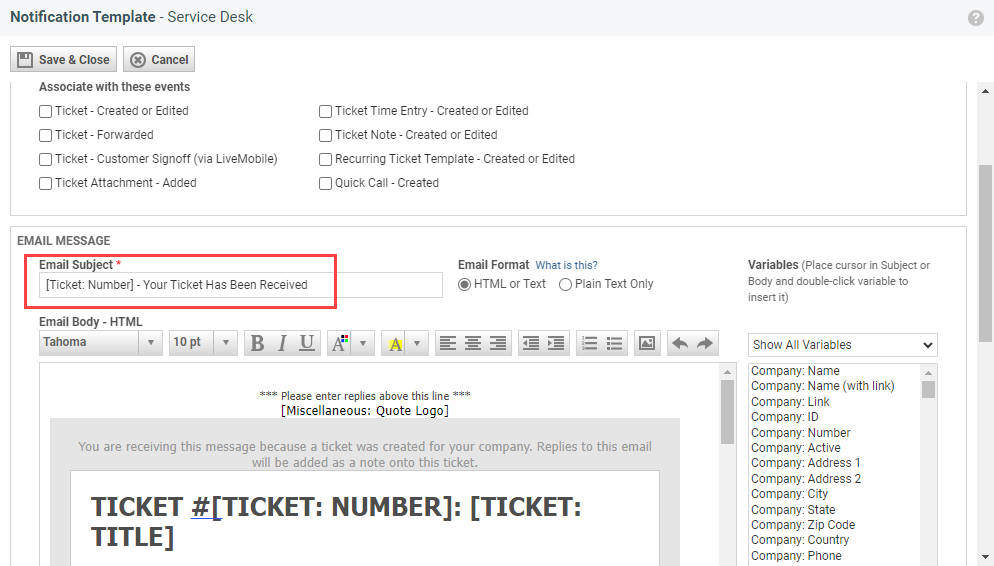
This ensured that notes and time entries were added to the existing task or ticket, creating a "conversation view" in Autotask. However, changing the Subject line to [Ticket Number] - Note added or similar means that Outlook sees that as a different conversation.
To get a conversation view in your email program and avoid creating dupes in Autotask, do the following:
- Navigate to
 > Admin > Automation > Email Notifications & Surveys > Notification Templates.
 - Click the Service Desk tab.
- Edit each active notification template for all events and add the [Ticket: Number] - [Ticket: Title] variables into the Email Subject field. Do not add any other text in the Email Subject field.
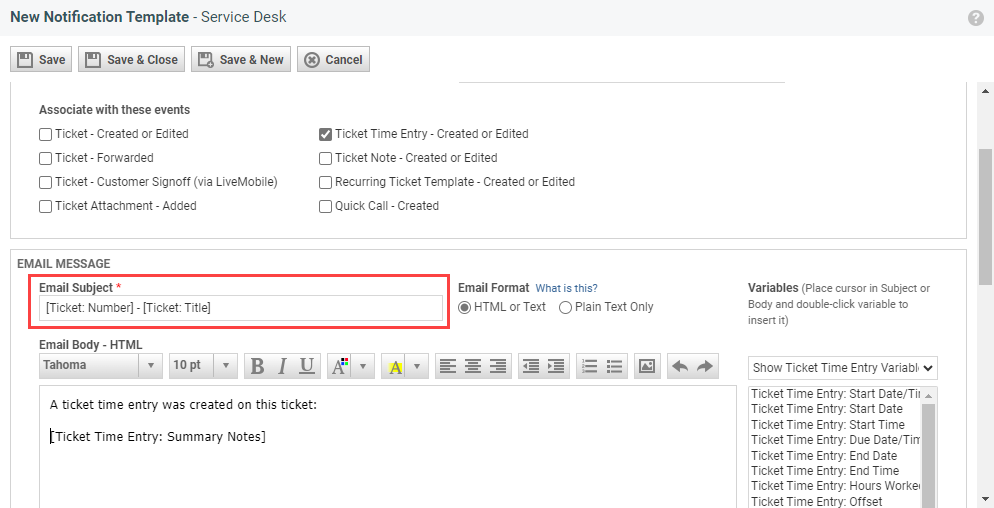
The ticket number will ensure that the time entry will be added to the existing ticket, and the constant [Ticket: Number] - [Ticket: Title] subject line will do the same in your email application.
List of improvements and fixes in this release
| Type | Summary |
|---|---|
| Improvement | We have added a Sync Now button to the Integrated Customer Billing page in Admin > Kaseya Integrations. When you click this button, a job is created to process metric data for all enabled Kaseya modules immediately, rather than having to wait for the next scheduled nightly process. |
| Improvement | We have enhanced the Autotask integration with KaseyaOne so that users no longer need to manually enable the integration for themselves. |
|
Fix |
Fixed an issue where a $ symbol at the end of a hyperlink was deleted by the Autotask email processor. |


