2024.1 Release Notes
Schedule
For an explanation of the zones, refer to Where am I hosted?
| Zone | Date | From (UTC) | To (UTC) | Duration |
|---|---|---|---|---|
| Limited Release and UK Limited Release | 1. February, 2024 | 02:00 | 06:00 | 4 hrs |
| America East 1 & 2 | 8. February, 2024 | 02:00 | 07:00 | 5 hrs |
| America West 1 & 2 | 15. February, 2024 | 02:00 | 07:00 | 5 hrs |
|
UK, UK 2 and EU 1 (English) |
7. February, 2024 | 20:00 | 01:00 | 5 hrs |
|
Australia and New Zealand |
15. February, 2024 | 15:00 | 17:00 | 2 hrs |
| German and Spanish | 14. February, 2024 | 20:00 | 22:00 | 2 hrs |
IMPORTANT All dates are subject to change. For up-to-date information on scheduled releases, refer to the Datto Status Page.
New Features
Ticket priority is a critical part of resolving tickets. Without a framework for establishing priority, it is challenging to meet service-level agreements and trigger incident escalations appropriately. If priority becomes a subjective process of personal interpretation, tickets cannot be resolved in an efficient and logical way.
Impact (on a single contact, multiple contacts, or the entire company) and urgency (the inherent severity of the issue: low, medium, high) should determine the priority that is assigned to a ticket. To make this process easier, we allow administrators to map all possible combinations of impact and urgency to ticket priorities.
Since our customers' ticket priority lists contain many custom values, the priority options are initially unmapped. To map impact and urgency to a ticket priority, do the following:
- Navigate to the Admin > Features & Settings > Service Desk (Tickets) > Impact & Urgency Mapping page.
- For each possible combination of urgency and impact, select the ticket priority that will initially populate the Priority field.
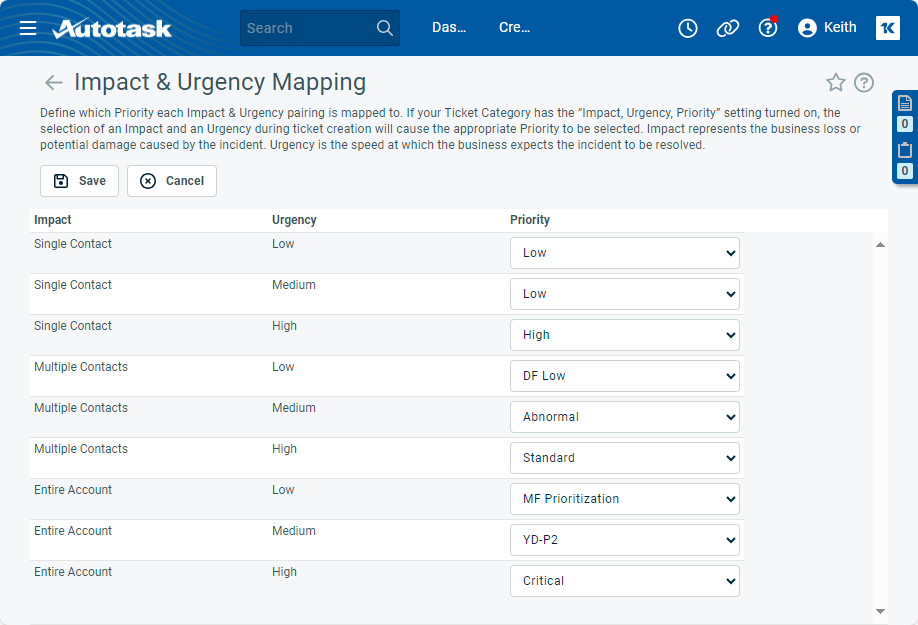
- Click Save.
Note the following:
- Impact and urgency can only be mapped to a priority during ticket creation, not while editing a ticket.
- You can assign the same priority to multiple combinations of impact and urgency.
- It is possible that ticket categories exclude certain ticket priority options. If that is the case, selecting impact and urgency will leave the Priority field blank.
- If a ticket priority is inactive, it cannot be selected. However, if a mapped priority is inactivated, it remains mapped.
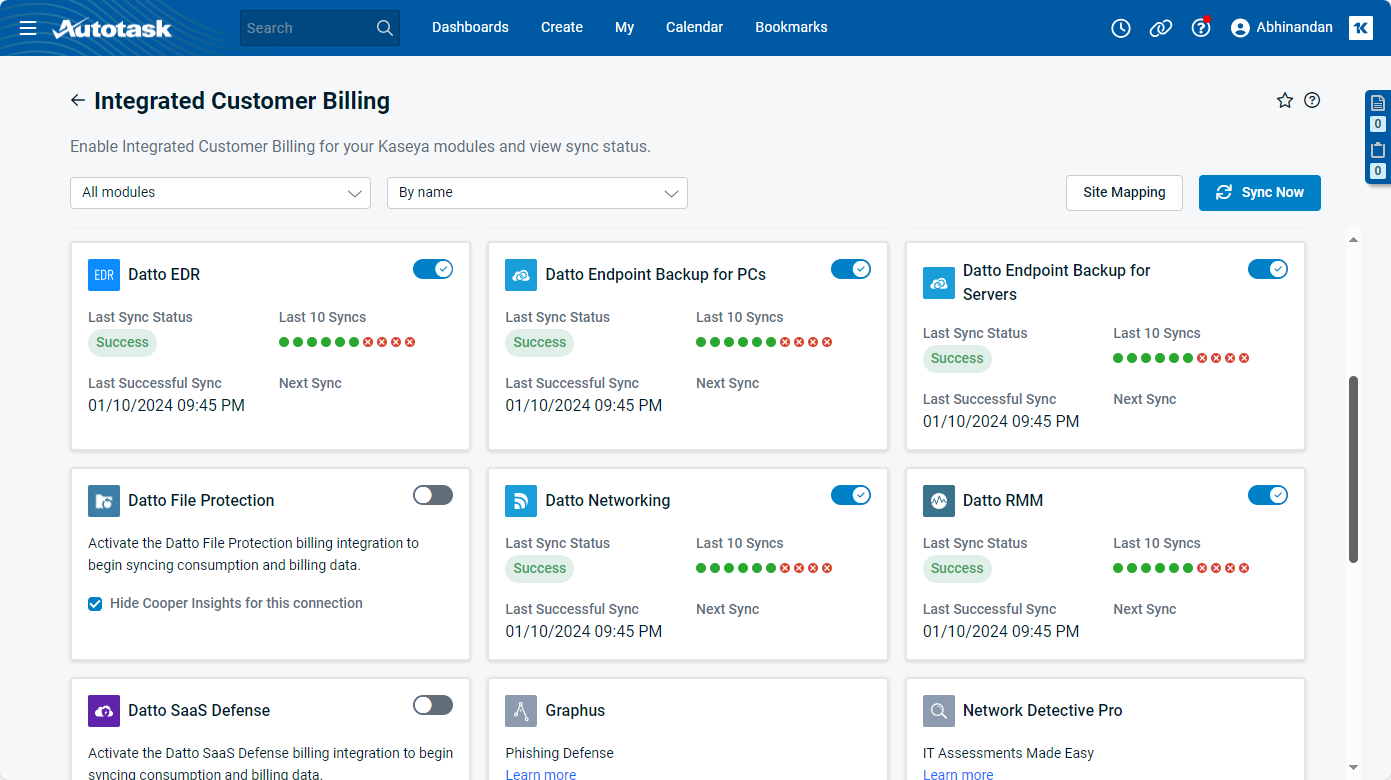
On the dashboard, we have added the ability to group and filter pending and posted billing items by Kaseya module. Kaseya module grouping and filtering is only visible if Integrated Customer Billing is enabled.
Integrated Customer Billing allows you to bill for Kaseya modules in Autotask using contract services. Billing items are a period on a contract service.
- To get any meaningful data, you must be completely set up with Integrated Customer Billing.
- Then, you must allow the overnight sync process to run successfully at least once, so you have some data to report on.
- Finally, you must create one or more widgets in the Pending Billing Items and/or the Posted Billing Items entity, and group and possibly filter the data by the new Kaseya Module selection.
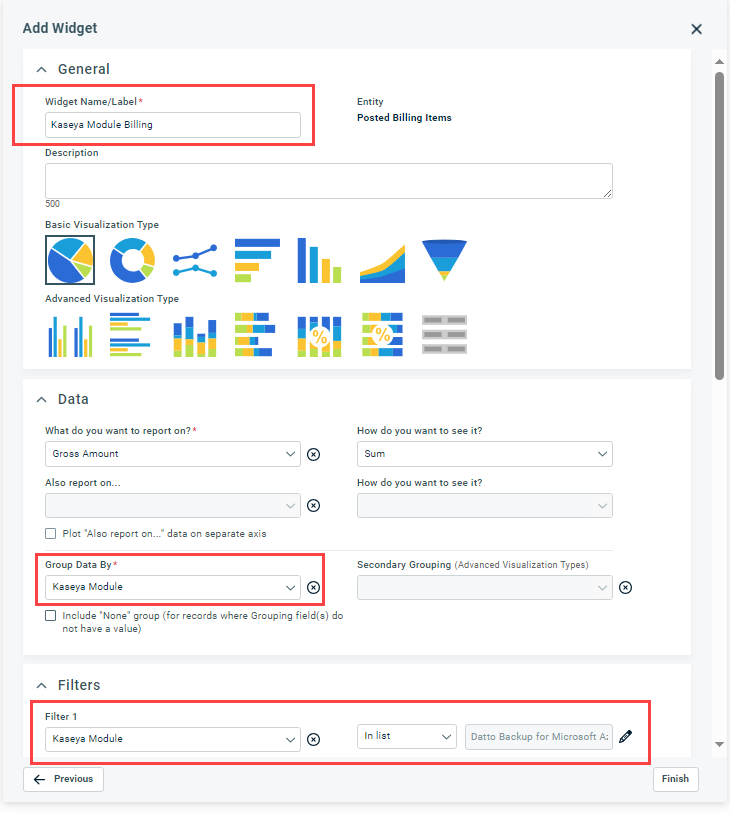
- Add the widgets to a dashboard tab, maybe a new "ICB" tab:
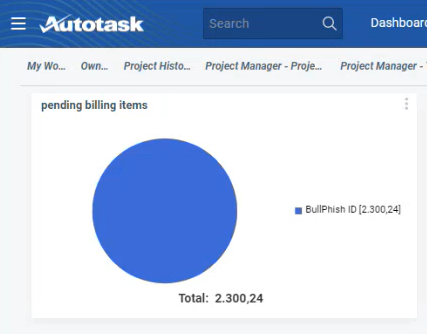
- You can drill into the widget and manage the data in the normal manner.
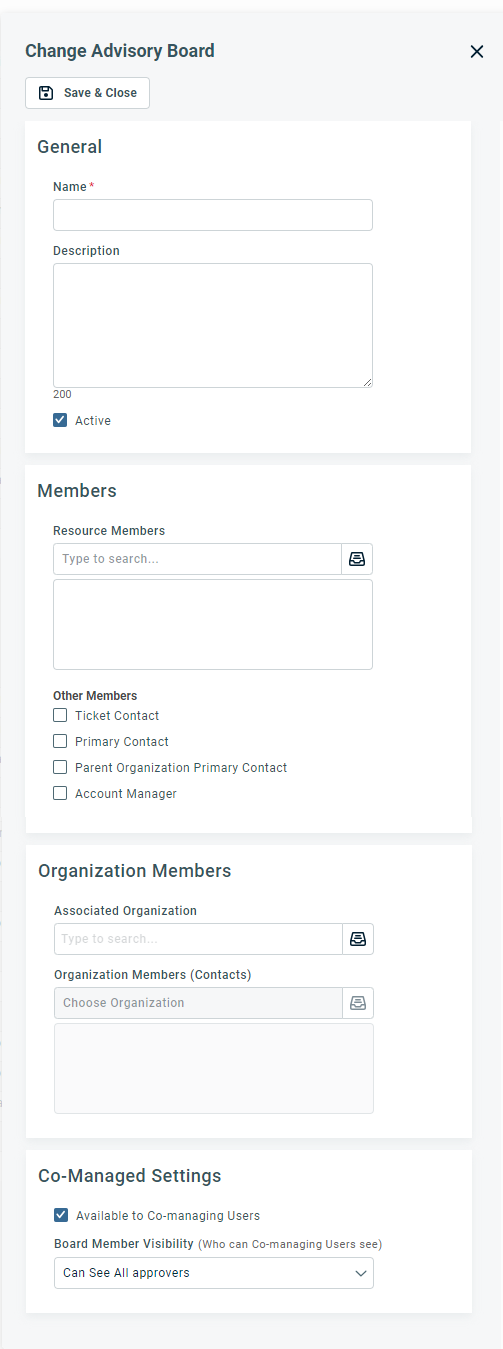
In addition to globally available advisory boards, you can now create change advisory boards (CABs) that are associated with a specific organization.
Simply select an organization in the Organization Members section of the CAB you are creating or editing. In addition to resources and co-managing users, this will allow you to add contacts of this organization or its parent organization as approvers.
- Access to the Client Portal is required to grant approval, so the organization must be of type Customer or Vendor.
- You will not be able to use an organization-specific CAB for change management tickets associated with any other organization.
NOTE If the parent-child relationship is broken, parent organization contacts will automatically be removed from the CAB.
CABs not associated with an organization are considered "global. " You cannot add organization contacts as permanent members to the change advisory board, but you will be able to use the Other Members option for a specific ticket.
PERMISSIONS Permission to Delete/Uncomplete checklist items
Users with permission to delete or uncomplete checklist items can delete individual items or can use the bulk menu to delete all, non-complete, or selected items.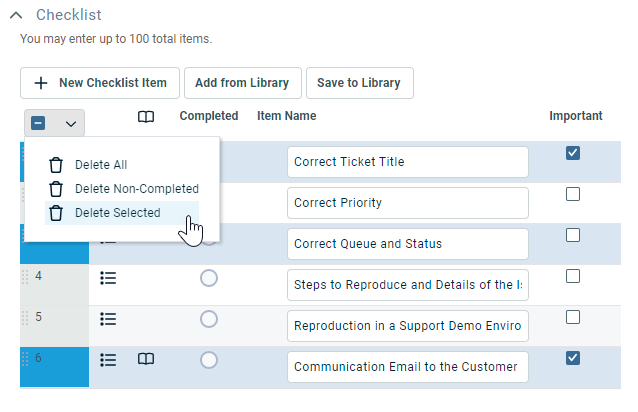
Do the following:
- On the entity page, click Edit.
- Navigate to the Checklist section.
- Right-click on a checklist item and select Delete.
- To delete multiple items, select them using Ctrl-click, and then select Delete Selected from the bulk menu. Or, select Delete All or Delete Non-Completed without row selection.
- The specified items are removed from the checklist.
NOTE You must save the ticket to permanently remove the deleted items. If you made a mistake, cancel the editing process.
On tickets only, users who have the IT Glue integration enabled can generate an Autotask ticket checklist from an IT Glue checklist template.
To select an IT Glue checklist template do the following:
- Create a new ticket or put an existing ticket in Edit mode.
- In the ticket Checklist section, click Add from IT Glue.

The Select Checklist window will appear.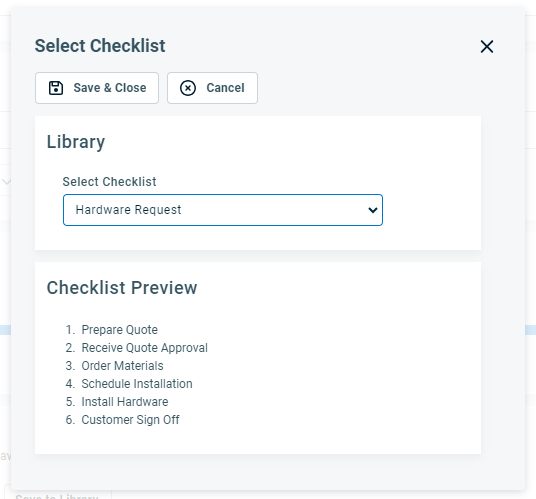
- Select an IT Glue checklist. A preview of the checklist items will be displayed.
- Click Save & Close. The checklist tasks will be added to the Autotask checklist as items, but assignees and due dates will not be created.
IMPORTANT Once added to the ticket you will be able to manage the checklist like any other Autotask checklist. No restrictions will be placed on items originating from IT Glue checklist templates. It will not be linked back to IT Glue.
Organizations that have the IT Glue integration enabled have the option to map a ticket library checklist to an IT Glue checklist template. Checklists associated with tasks are not supported.
- Click the dropdown control and select a ticket checklist template.
- Once you select a template, a preview of the current checklist items in IT Glue will be displayed.
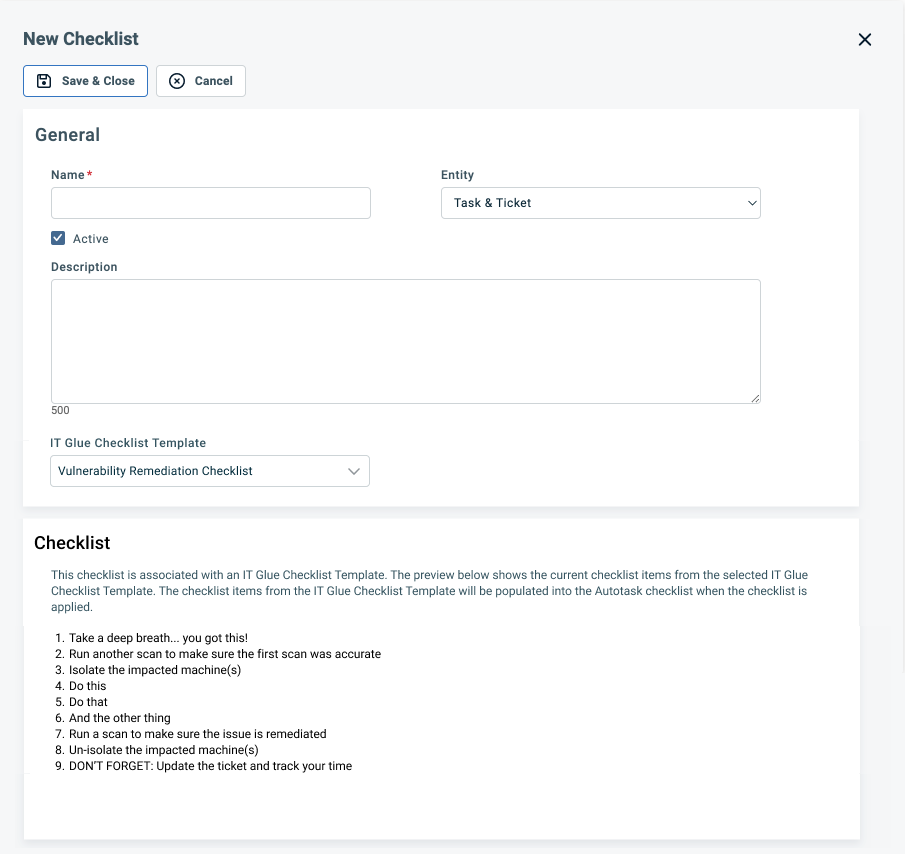
- The checklist items from the IT Glue Checklist Template will be populated into the Autotask checklist when the checklist is applied to a ticket.
- On the Checklist Library page, a check mark in the IT Glue Checklist column indicates that the checklist is associated with an IT Glue checklist template. Hover over the check mark to display the name of the IT Glue checklist in a tooltip.
- This option is available only for ticket checklists.
- Click Save.
NOTE You cannot manually edit checklists associated with an IT Glue checklist template or create additional checklist items. You can edit the ticket checklist created from the template.
In the new Client Portal, each user can select the language they prefer from the following options:
- English
- Spanish
- French
- German
To select a language, do the following:
- Navigate to the user menu in the top right corner of your window.
- Click the dropdown next to your name and select Settings.

The Settings page will appear.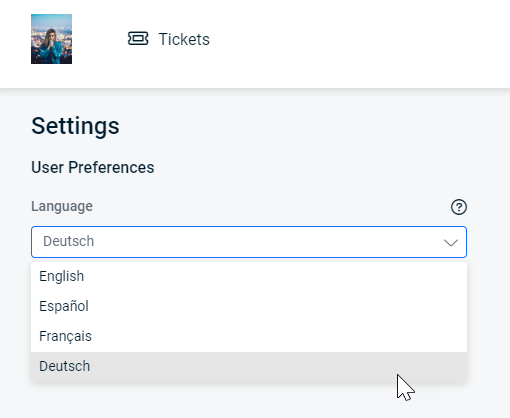
- Select your preferred language and click Save. The page will be refreshed and appear in the selected language.
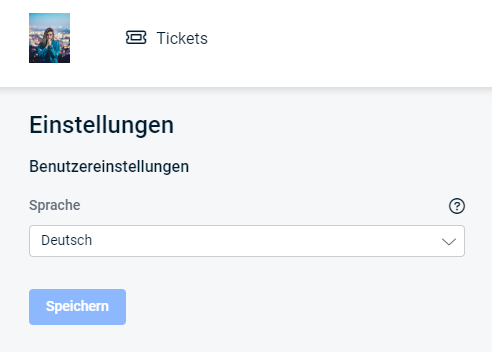
NOTE The selected language only applies to the new Client Portal. If you return to the Legacy Client Portal, the language reverts to its language setting. Also, the names of any custom fields created by your service provider will appear in the language they were entered, as will any data.
You can now bulk edit and delete multiple to-dos or CRM notes at one time. This feature is similar to the task and ticket Forward/Modify feature, and is available on the to-do and notes search pages, as well as on the to-do and notes Accessory tabs on organization, contact, and opportunity pages. Widget grids do not support bulk menus.
To edit multiple to-dos or CRM notes at one time, complete the following steps:
- Navigate to a to-do or note search page or an entity accessory tab.
- Use the check boxes in the left column to select multiple items.
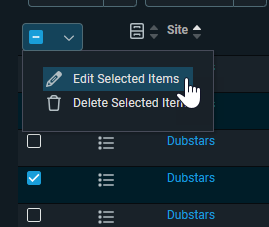
- Click on the bulk menu and choose Edit Selected Items. The Edit Selected Items page will appear.
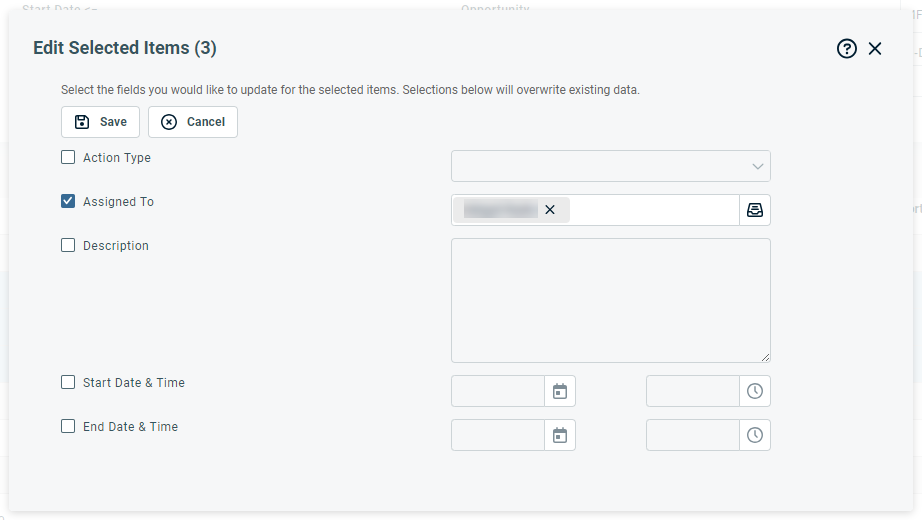
- Select the check box for the fields you want to edit. Fields that are not selected will not be updated.
- Enter the updated values.
| Field | Description |
|---|---|
| Action Type | Required if selected. |
| Assigned To | Required if selected. |
| Description | Not required even if selected. You will still be able to save the page. |
| Start Date & Time | Required if selected. You must select a date and time prior to the earliest end date and time for a selected item. |
| End Date & Time | Required if selected. You must select a date and time after to the latest start date and time for a selected item. |
- Click Save when you are done.
We have created a deeper integration with the ConnectBooster portal. Autotask invoices that have been synced with QuickBooks (online or desktop) can be paid by the service provider right from the Autotask invoice or from the Invoice History page, and by the client contact from the Client Portal invoice.
- Make sure the Invoice Number field has been populated from QuickBooks and the Date Paid field is empty.
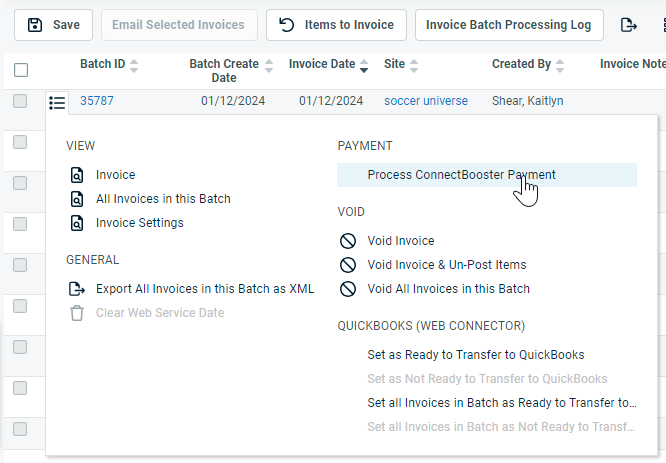
- On the Invoice History page, select Process ConnectBooster Payment from the context menu.
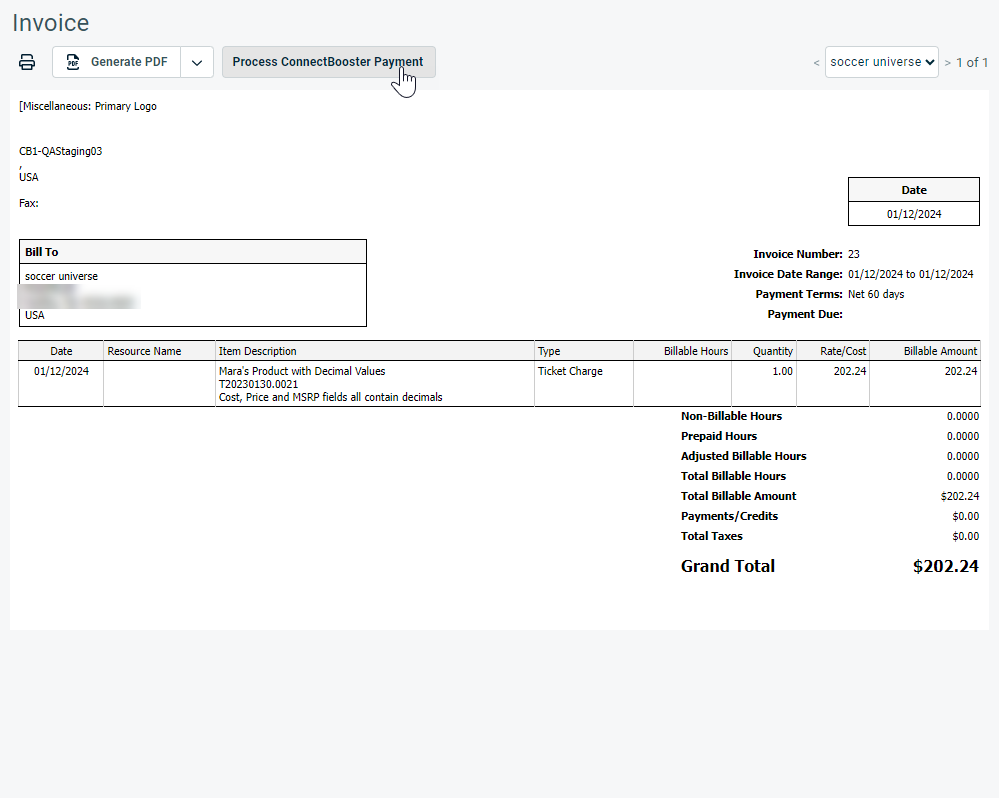
- On the Invoice page, click Process ConnectBooster Payment.
- The Assign Payment Contact dialog window will appear. You must enter the name of the contact on whose behalf you are making the payment.
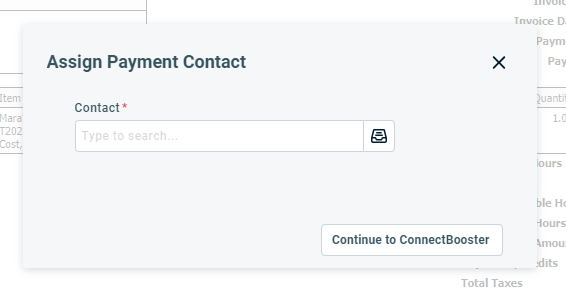
- Start typing or select an organization contact.
- Click Continue to ConnectBooster. The Order Summary page will open.
- By default, the total balance will be paid. Enter a different amount if desired.
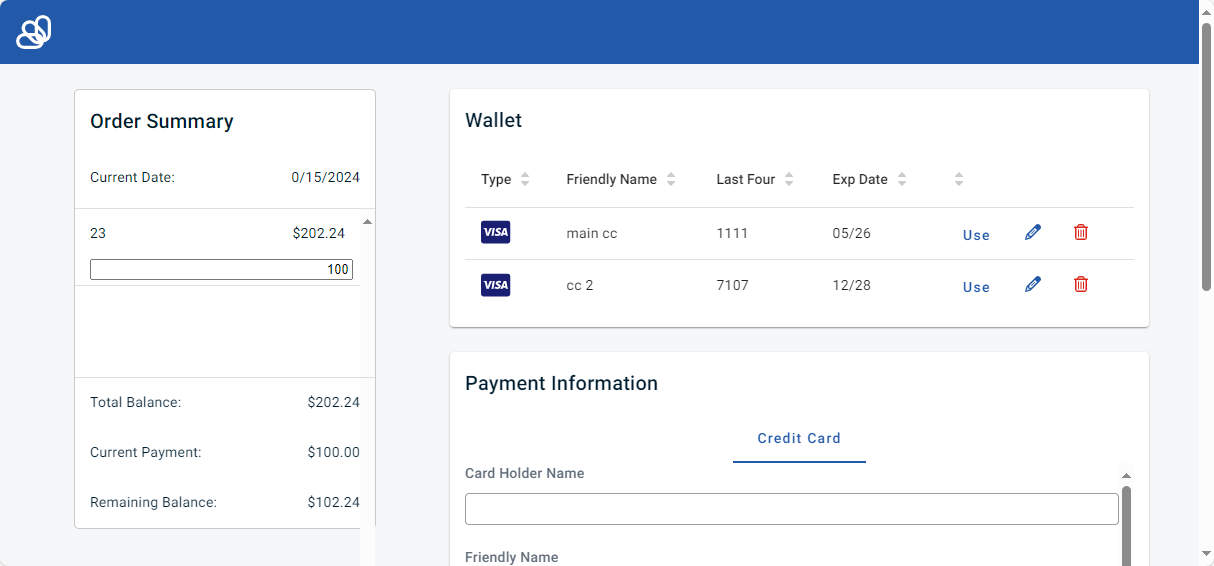
- In the Wallet pane, click Use. To confirm your selection, click Pay.

- You will see several verification, processing, and success dialog pages.
- If there is an error, you can close the dialog and try again or go back to Autotask.
- To add a new payment method, complete the Payment Information section.
IMPORTANT The integration with both the payment gateway and QuickBooks must be fully configured before ConnectBooster is integrated with Autotask.
List of improvements and fixes in this release
| Type | Summary |
|---|---|
|
Improvement |
If Integrated Customer Billing is enabled, the mapping of module billing types to Autotask services on the Service Mapping page of the contract is now copied to the renewal contract. |
| Improvement | We are now limiting the size of the task note and ticket note description to 1 Million characters. |
|
Improvement |
We updated the character limit of the Contract Milestone Title field to 100. |
|
Fix |
We fixed an issue with an STDE error that was thrown when adding regular time directly to the timesheet record if the Timesheet system settings did not require summary notes for regular time. |
|
Fix |
Removed the Preview Client Portal feature from the Admin > Extensions & Integrations > Client Portal & Taskfire > Manage Client Portal Organizations > Client Portal Organization Detail page. Please open the Contact page and preview the Client Portal from Tools > Preview Client Portal as this Contact. |
|
Fix |
Fixed an issue where the Date/Time stamp for ticket notes was not retained when merging tickets and changed to the date and time the ticket was merged. |
|
Fix |
Added the missing field Contact Invoice Recipient (single value) to the Company Export - In Import Template Format. |
|
Fix |
Fixed an issue where the Secondary Resource was cleared when selecting 'Make Primary Resource a Secondary Resource' and changing Queue. |
|
Fix |
Fixed an issue with incorrect variable names being used when you run Project Financials report on a project with no labor changes and a billable expense. |
|
Fix |
Fixed an error that happened when a user with CRM Company Object permission of My Territories and Service Desk Ticket View of Mine + Companies created a Recurring Service template and did not assign themselves as primary resource. |
|
Fix |
Fixed an issue with recurring contracts where the Final Billing Date was not updated to a new Contract End Date when the Billing Account Notification Contact was inactive. |
|
Fix |
Fixed an error where the Inventory Location's time zone was overridden by the user’s general time zone. when applying a date filter on Inventory > History > Transfers & Updates page. |
|
Fix |
Fixed some issue related to European datetime formats and workflow rule date-based conditions that were not defaulting their calculation methods to calendar days. Contract workflow rules were firing prior to the end date. |
|
Fix |
Fixed an issue where the system date was incorrectly applied to the Purchase Order: Latest Estimated Arrival Date when used in email notifications. |
|
Fix |
Fixed an issue where changes made on the Associations tab for a co-managing user are not saved. Changes made in any other tab were saved, but for the Associations tab, it always displayed the values set by the user while enabling co-managing access. |
|
Fix |
Fixed issue where during product import, you could set a serialized product that had an associated stocked item to Not Serialized, which created bad data. |
|
Fix |
Fixed an issue with two-digit year formats, where Autotask reverted any years 2030 or greater to 1930. |
|
Fix |
Fixed an issue where MS Exchange was syncing Contacts to Autotask with the display name of "EmailAddress1." |
|
Fix |
Fixed an issue where the contract on a project was updated, but the unposted time entries were not. |
|
Fix |
Fixed an issue where attempting to open a knowledgebase article resulted in an error. |
|
Fix |
Fixed an issue where an STDE error was received when clicking Finish on the Won Opportunity Wizard, even though the opportunity was still won, and items were created. |
|
Fix |
Fixed a bug where an Outsourcing setting prevented users from toggling the "Show on Invoice" setting in recurring contracts. |
